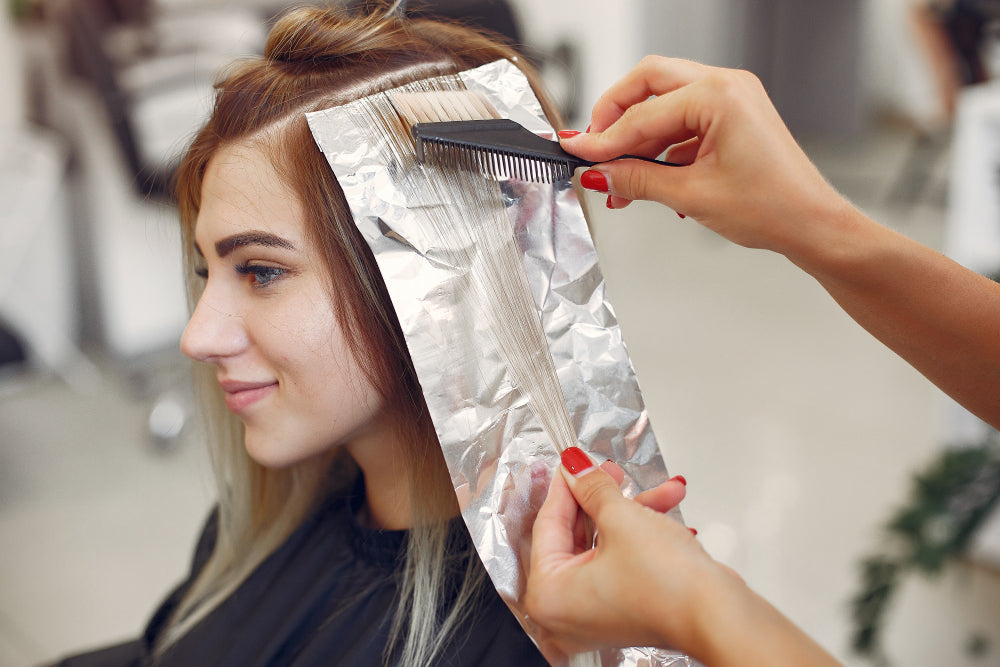
Can You Dye Clip-In Hair Extensions
This article provides a complete guide to safely dyeing clip-ins for both color correction and new look purposes. We explain the distinction between human hair and synthetic hair and provide information about suitable products and a detailed procedure for proper dye application.
We will assist you in determining whether to attempt DIY dyeing or seek professional assistance, or purchase pre-colored extensions. Let’s dive in.
Quality of Materials
Can You Actually Dye Clip-In Extensions?
Yes but dyeing clip-in hair extensions works only with real human hair extensions. Human hair extensions function identically to natural hair because they can be dyed and toned and cut, and styled.
The natural cuticles in human hair extensions enable color absorption, which allows users to darken or slightly lighten their hair color.
Synthetic extensions do not respond to hair dye applications. The plastic-like fibers in synthetic extensions fail to absorb hair dye which results in damage to the texture or causes breakage when dyeing attempts are made.
- The extensions are made of 100% Kanekalon fiber, which stands as a premium synthetic material that creates hair that resembles real human hair in both appearance and feel at 98% accuracy.
- The extensions have a smooth texture with softness that produces realistic results, which blend easily with your natural hair.
- It resists tangling and remains lightweight, so you can easily handle it without weighing down your hair.
- You can style this product using heat tools or wash it because it behaves like real hair.
- Halo extensions provide an immediate transformation that requires no ongoing dedication.
What You Need to Know Before Dyeing Clip-In Extensions
Take a moment to examine your clip-in extensions before you start dyeing them. The materials used in extension manufacturing differ between products, and their composition determines their quality.
You are lucky if you have 100% human hair extensions, particularly virgin Remy hair. These hair types accept color well to produce stunning results.
Here’s what to keep in mind:
- The process of dyeing hair darker is simpler and safer than attempting to lighten it.
- Bleaching extensions of any quality can cause damage to the hair.
- The most successful results occur when you stick to tone changes between warm and cool colors or make small darkening adjustments.
- The tape-in method provides a secure and non-damaging attachment that will last between 8 to 10 weeks when you follow proper maintenance instructions.
- The ideal choice for someone who desires extended wear and enjoys regular hair styling.
The light color of your extensions provides you with more options for changes. You can deepen your hair color or apply a toner to achieve your desired shade.
Still unsure? A brief consultation with a stylist will protect your extensions while also preventing unnecessary delays.
Maintenance and Application
Step-by-Step Dyeing Process
You can achieve outstanding results at home dyeing your clip-in extensions if you take the right precautions and execute each step correctly. The complete guide begins with setup and continues through final rinse to provide confident color processing and protection of your investment.
Materials and Preparation
Begin the process by collecting these essential items:
- Hair dye (professional-grade recommended)
- Developer (10-volume or as directed)
- Mixing bowl and brush or applicator bottle
- Latex gloves
- Wide-tooth comb
- Foil or plastic wrap
- An old towel or sheet to protect surfaces
- Clips for sectioning
- Sulfate-free shampoo and deep conditioner
Your work area should be located in an illuminated space that has proper ventilation. Protect your workspace by applying a barrier to prevent stains from forming.
Before dyeing your extensions, start by washing them gently to eliminate product accumulation. After drying completely through air exposure, use a wide-tooth comb to detangle the extensions.
How the Brands Help You Find Your Matching Color
The color matching process at Thathair operates with exceptional ease for all users. Our system provides a straightforward experience for first-time extension buyers.
Just take our color match quiz, upload a photo of your current hair, and let our team handle the rest.
Step 1: Patch Test (Always!)
- Start with a hidden area of hair for testing before dyeing
- Wait 24–48 hours
- Check for color accuracy and any signs of damage
- Our Color Match Guarantee provides you with the ideal color selection
Most users achieve a perfect color match during their initial attempt.
Step 2: Section and Secure Extensions
- Lay out wefts by length or thickness
- Use clips to organize
- Work one weft at a time
Hold the halo like a headband—wire down, hair up. Adjust the wire to fit snugly but comfortably around your head, sitting just above your ears. It shouldn’t feel tight—just secure.
Available Colors and Lengths
Thathair provides with options that are easy to choose from and always blend beautifully.
Step 3: Mix Your Dye
Textures:
- Follow the dye instructions exactly
- The amount of dye should match the current weft Aim for a smooth, creamy texture
Step 4: Application Technique
- Apply from the root of the weft to the ends
- Use plenty of dye to fully saturate
- Avoid getting product on clips or seams
- Work in one direction for smooth results
- Grey Hair Extensions
Step 5: Processing Time
- Stick to the timing on the dye package
- Check every 10 minutes for progress
- Extensions may absorb color faster than your natural hair
- 22 Inch Hair Extensions
(Available in both straight and wavy textures)
Step 6: Rinse and Condition
- Rinse gently with cool water
- Use sulfate-free shampoo (skip this step for watercolor methods)
- Deep condition to restore softness
- Air dry fully before styling or storing
When to Ask a Pro for Assistance
A professional stylist should be consulted if you doubt your extension type or plan to make a major color change or experience processing anxiety. They will assist you in achieving your desired color, which maintains the safety of your extension products.

Common Issues and How to Solve Them
The process of dyeing clip-in extensions remains prone to errors even with proper preparations. The following section lists the most typical problems alongside their corresponding solutions.
1. Uneven Color
The practice of dyeing multiple wefts together at once instead of separate sections leads to this color issue.
How to avoid it:
- Apply the dye generously to each weft
- Work in thin layers, one weft at a time
Apply color evenly across both sides of the weft by using a brush or your fingers - Not all shades are available in all textures or lengths (but you can dye them)
- Halo options are limited and vary by stock
2. Color Doesn’t Match Your Natural Hair
The application of hair dye onto extensions produces a different result than on your natural hair when the base color does not match closely enough.
How to avoid it:
- Select an extension color that is one shade deeper than your existing extensions
- Test the dye on a single strand before proceeding to dye all your wefts
- Consult a professional to perform a color match when you are uncertain about the process
- Halo options are limited and vary by stock

3. Hair Doesn’t Absorb Dye
Extension products and synthetic materials prevent the dye from penetrating the hair fibers.
How to avoid it:
- Always wash extensions before dyeing to remove buildup
- Select only human hair extensions because synthetic hair does not respond to hair dye
- Check the label or product details before purchasing
- Halo options are limited and vary by stock
4. Dryness and Damage
Harsh dyeing and bleaching methods will damage the hair quality of extensions by making them brittle and dry and sometimes causing breakage.
How to avoid it:
- Never bleach clip-in extensions
- Use only gentle, sulfate-free products
- Deep conditioning after dye application helps restore the hair's natural softness
- Halo options are limited and vary by stock
5. Dye on Clips or Seams
The dye solution that comes into contact with the clip attachment points causes glue deterioration and metal staining and creates slippery conditions.
How to avoid it:
- Apply dye with care while keeping it away from the clip attachment points
- To protect the base area during application, use foil or wrap
- Add the extra clips: The included 2-clip wefts provide better side blending and extra security when used with your halo.
- Don’t overbrush the wire: Brush the top area gently to avoid tugging while maintaining your hairstyle in place.
When to Ask for Help
When in doubt about your extension type or planning major color transformations or experiencing processing anxiety, it’s best to seek help from a professional stylist. They can help ensure safe handling and beautiful, lasting results.
Aftercare & Maintenance
After dyeing your clip-in extensions, you must follow proper aftercare methods to maintain their health and softness, and vibrant color. The coloring process puts significant strain on hair extensions, so they require additional care after treatment.
- Avoid washing, swimming, or sweating
- Skip heat tools like blow dryers or curling irons
- Handle gently and store flat or hung up, not bunched
For long-term care:
- Use a color-safe, sulfate-free shampoo and conditioner
- Apply UV protection spray if you’ll be out in the sun
- Always use a heat protectant before styling
- Deep condition your extensions at least once a week
The color maintenance requires periodic touch-ups of tone or shade every 4–6 weeks based on your extension usage and washing frequency.
Signs it’s time to replace your extensions:
- Hair feels stiff or overly dry, even after conditioning
- Shedding or tangling becomes frequent Color looks dull and uneven despite upkeep
- Always use a heat protectant before styling
- Deep condition your extensions at least once a week
Proper care techniques will extend the lifespan of your extensions while maintaining their beautiful appearance. You should handle your extensions with the same care as your natural hair, but with additional precautions.
Final Thoughts
Dyeing clip-in extensions is possible, but it takes the right hair type, careful steps, and consistent aftercare. You’ve learned how to prep, dye, and care for your extensions the right way—and how to avoid common mistakes that could ruin them. But let’s be honest, the process can be time-consuming and risky, especially if you're not working with 100% human hair.
That’s why we recommend trying our Halo Hair Extensions from Thathair as a smarter alternative. They’re easier to put on, store, and maintain—with no clips, no glue, and no damage to your natural hair.
While we don’t suggest dyeing Halo extensions, we offer a wide range of shades so you can find your perfect match without lifting a brush. And if the color isn’t right? No stress—you can easily switch products.
Related Products

Josef Mohamed is a Content Marketer and Web Designer with over 6 years of experience.He brings a wealth of knowledge to his work, making him a reliable source for readers interested in practical insights about beauty. His writing style is straightforward, aiming to provide real facts and avoid common myths in the beauty industry.


